Saturday, February 26, 2011

Safari / Jungle Cake

The hardest part of making a cake is always delivering it.  Its like you are dropping off your child.  Ok, not that bad, but I often feel that way when I see it go. :)  C'est la vie.

It has been delivered and my friend LOVED it. :)  Actually loved might be a little understated.  She jumped up and down and screamed.  I don't think I've ever gotten such a great reaction to anything I've done before!

And I hope you all agree, so without further ado . . .


Happy Baking!

Friday, February 25, 2011

Fondant Safari Animals - Part II

I know I promised these a few days ago, but I get kinda swept up in the moment when making a cake and forget about everything else, so please forgive me.  As promised, here are the lion and hippo . . . 


They have since joined their friends on the side of the cake, which is a beautiful sky blue color.  Oh, and here are the tree bottoms:


Which have also joined their friends on the cake and been adorned with bush-like leaves, and enjoying the feel of the grass whipping against their sugary trunks . . . 

Oh wait, did I forget to tell you that the cake was done?  I did?  Silly me!!  It is stacked and decorated in all its coolness in my refrigerator.

Happ.......

I'm sorry, were you expecting pictures? :)  I know, I'm terrible . . . but at least you gave me a good laugh.  I do not show pictures of cakes on the blog until the cake is delivered.  And since I am delivering it tomorrow morning I should expect to see you all up, awake, and checking my blog between 10 am and 12 pm for final pictures. :)

Lets try this again . . . 

Happy Baking!! 


Wednesday, February 23, 2011

Fondant Safari Animals

This week I got a call from a friend asking if I could make a cake.  I had a general idea of what she was looking for, so I went online for some ideas.  In the process I realized that I was going to need to make a few fondant safari animals, specifically an elephant, tiger, giraffe, zebra, and hippo.  The question was then whether I should make them two dimensional or three dimensional.

And so, I drew out a design.


Gotta love the drawings right?  Maybe I should go to art school someday . . . 

I tried the cake idea with 2D animals.  My friend came back and asked that we remove the age and the snake, but loved the rest of the cake.  No problem!  So I thought a little bit more and decided . . . lets convert one of these animals to 3D for the top of the cake.  The birthday girl's favorite animal was the elephant - which made this choice very easy!

I found a great tutorial on You Tube from Tea for Two Bakery in Ontario, Canada.  It was so good, I wanted to share it with you (with her permission of course)!


While watching the video, I attempted the process.  What I ended up with was so amazing, I couldn't even believe I had made it!  Great tutorial Tea for Two!!

Before Eyes . . . 


I was super-pleased with how he came out and so I decided to try and attempt a few 3D birds to replace the snakes on the cake . . . 


Two cockatoos, and two parrots.

(In case you are wondering they are drying on greased wax paper so that they don't stick.)

The elephant took approximately 40 min to an hour, and the birds (all four) took about an hour (including coloring the fondant).  I was in love. :)

I began on the 2D animals next.  There are very few cookie-cutters or outlines that looked the way I wanted the animals to, so I ended up drawing my own outlines for all four animals.  I began last night with the zebra and giraffe.

I should mention that since I am crunched for time to finish the cake, I do not have tutorials on anything I did.  However, I have had a blast making them and could easily be convinced to do one or two tutorials and even post the outlines of the animals for you to use.  Just leave me a comment and I will be happy to reply. :)

Ok, so without further ado . . . the giraffe and zebra.


And this is the pan drying in my kitchen:


Tonight will be lions and hippos, and tomorrow the cake assembly will begin.  Look for more posts as the week goes.  And again, if you want to see any of these as a tutorial or you want the outlines, leave me a comment. :)

Happy Baking!

Thursday, February 17, 2011

Love and Creme Brulee

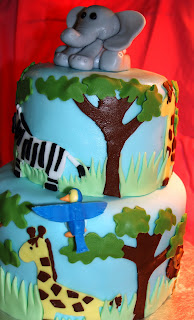
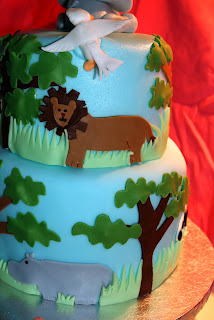
As I have already told you, Valentine's Day was almost entirely planned for us by my three year old daughter.  After telling you that, I felt I really should show you some pictures of the adorable table settings she arranged before digging in to the sweet stuff!


Isn't she adorable??

And as an added bonus, you can see my special dinner.  Pork loin rolled in herbs and wrapped in bacon....Thank you dear cousin!!


Don't blink, its the last time you'll see me make something so decadent (or good!) cooking-wise. . . As they say, you are either a cook or a baker.  And as you can probably guess, I am the latter. :)

Ok, now onto the sweet stuff.  My husband's favorite dessert is creme brulee.  He was introduced to it merely 2 years ago and I think he's been begging me since then to try making it.  I figured, what better time to try it then Valentine's Day?  So I went to Bed Bath and Beyond and picked up their Creme Brulee set, looked up an online recipe, and went to town!

To begin you take 8 egg yolks and beat them, then add 1/2 C of sugar and mix them until they are well combined.

Then take 2 Cups of heavy cream and heat it to right below simmering.  Once heated, add 1/4 Cup of the cream, (1 tablespoon at a time) to the egg mix.  You don't want to heat the eggs up too quickly as they will cook prematurely.  This process is referred to as "tempering".


Once you temper in 1/4 cup of cream, you can add the remaining cream to the eggs.  You then add the 1/2 teaspoon of vanilla to the mixture.


Then strain the mixture through a fine mesh sieve, before pouring it into the ramekins.  This creates a really smooth custard.


Now boil about 4 cups of water.  You'll need that in a minute.  While you're at it, preheat the oven to 250.  There, I'll stop being demanding now. 

Now to pour the mixture into the ramekins.  I started by filling the 4 - 3oz ramekins first since that is what came with the kit.  However, I was very glad I had picked up two much larger 8oz ramekins for overflow, since there was plenty of it.  I would suggest getting more of the 3oz ramekins rather than having overflow into larger ramekins.  The end result of the large ones seems to be a little too much custard.

Next place the ramekins in a deeper 9x13 pan, and pour in the boiling water around them until the water rests half-way up the side of the ramekin.


Then insert them into the oven, and bake for about 50 minutes.  After 50 minutes, take rubber-tipped tongs and remove one of the ramekins, slightly shaking it.  If the inner portion of the custard still jiggles while the outside is firm, they are done.  If they do not jiggle at all, but are firm all the way through, they are slightly overdone but don't worry, they are still delicious!!  If they are not quite done, cook them at 10 minute intervals until they are finished.


Remove them from the oven, and put them on a wire cookie rack to cool.  Allow them to cool to room temperature before placing them in the refrigerator.  


At this point, the recipe states that you should leave the custard in the refrigerator overnight.  Since I completely missed that when I read the instructions the first time and wanted them done more quickly, I took the two we were going to eat that evening and refrigerated them for two hours.  I left the remaining brulees to cool overnight with the intention of trying them the following day to see if the time elapsed made any difference. 

In the meantime, lets continue on with the brulees which were only refrigerated for only two hours.  Remove the two brulees from the refrigerator and cover the tops with approximately 1 tsp of regular refined white sugar.  Light your torch, and hold it so the flame is almost parallel to the top of the dessert, then angle it slightly towards the sugary top and allow the sugar to begin to caramelize.  How fast/slow the sugar melts and begins to look like caramel is dependent upon how close the flame is, and how fast you move the flame over the sugar.  After the first one, you sort of get a feel for it.

And wha-la!  Beautiful and impressive desserts!


They were delicious!

The following evening, I removed one of the remaining brulees from the refrigerator (an 8 oz version) and decided to try a different sugar on the top.  I added approximately 1 tablespoon of turbinado sugar, gently spreading it evenly over the top of the custard, and grabbed my blow torch.

I know, I know, its a culinary torch . . . but blow torch sounds soo much cooler.


I probably should have mentioned this earlier but I am somewhat of a pyro.  Turning on the torch brought back memories of flaming marshmallows and campfires, burning sticks while it dwindled . . . and I had to snap myself out of my fiery trance and return to the task at hand.


Forgive the blurry picture, but I have to say its hard to take a picture with one hand and torch evenly with the other.  I was not as impressed with the turbinado sugar as far as taste, but I have to admit it caramelized much more quickly than the refined white sugar.  The custard taste was pretty much the same as the night before, so I would say its probably safe to only refrigerate the custard for two hours rather than overnight.  At least for this recipe.

All in all, this was by far not the most delicious creme brulee I had tasted, but a very good home equivalent.  I have a few ideas for remedying that in the future but for now, I will say if you like the dessert, this is an easy home equivalent! 

Recipe again courtesy of Michael Chu.

Creme Brulee
8
egg yolks
1/2
cup
sugar
2
cups
heavy cream
1/2
tsp
vanilla
10
tsp
sugar
1
Pour the sugar into the egg yolks.
2
Beat the yolks and sugar until smooth.
3
Heat the heavy cream until almost simmering (you can bring to a simmer and let it cool a minute).
4
Add heavy cream to the egg yolks one tablespoon at a time while stirring vigorously until 1/4 cup of the heavy cream has been added.
5
Add the remaining cream to the mixture.
6
Add in 1/2 tsp of vanilla and stir.
7
Pour custard through a fine mesh sieve.
8
Pour the strained mixture into 8 -10 3-oz ramekins.
9
Place the ramekins in a baking pan. Pour boiling water into the pan (be careful not to get water into the ramekins), so that the water level is halfway up the sides of the ramekins.
10
Place in an oven preheated to 250°F for about one hour.
11
After 50 minutes, check to see if the custards are done. We want them to be set on the outside edge, but jiggly (like jello) at the center. The easiest way to do this is to take a pair of tongs with food grade rubber bands wrapped around the ends to help grip the ramekins. Pick up a ramekin and shake to see if the centers jiggle. If only the center jiggles a little, it's done. If the whole thing is set, remove immediately - it'll be a little over done, but still delicious. If it's not done, just put it back in the water bath and check again in ten minutes.
12
nce the custards are done, let them cool on a cooling rack to room temperature.
13
Refrigerate custards for two hours.
14
Remove the custard and spread 1 tsp of sugar over each custard.
15
Light your torch, and hold it so the flame is almost parallel to the top of the dessert, then angle it slightly towards the sugary top and allow the sugar to caramelize.
Servings: 10
Degree of Difficulty
Degree of Difficulty: Moderately difficult
Cooking Times
Preparation Time: 20 minutes
Cooking Time: 1 hour
Inactive Time: 2 hours
Total Time: 3 hours and 30 minutes
Nutrition Facts
Serving size: 1/10 of a recipe (1.8 ounces).
Percent daily values based on the Reference Daily Intake (RDI) for a 2000 calorie diet.
Nutrition information calculated from recipe ingredients.
Amount Per Serving
Calories
180.78
Calories From Fat (61%)
109.6
% Daily Value
Total Fat 12.37g
19%
Saturated Fat 6.77g
34%
Cholesterol 176.83mg
59%
Sodium 15.62mg
<1%
Potassium 33mg
<1%
Total Carbohydrates 15.37g
5%
Fiber 0g
0%
Sugar 14.3g

Protein 2.6g
5%

Sunday, February 13, 2011

Chocolate Chip Cookie Cravings

A few nights ago, at about 9:30 pm, my husband decided he wanted warm chocolate chip cookies.  After throwing a lot of flattering comments at me about how wonderful a baker I am (clearly an attempt to get his way), I got off the couch and made him cookies.  Because, when it comes to baking, I am a sucker for whatever he or my daughter may want. 

Okay, fine.  I'm a sucker for whatever they might want, baking or not.  Sue me. :)

But the request got me thinking . . . what sweet item do you crave?  What is it that can make you get up off the couch at 9:30 at night and whip up a batch, or run to the nearest bakery at 5:00 am to pick up their freshest version?  What is that one sweet that enters your mind occasionally and refuses to leave until satisfied?

I ask for three reasons.  One:  I would really like to better know my readers and what they want to hear. Two:  I would LOVE to hear more ideas of recipes I can research to transform them into any of the following:  gluten-free, egg-free, dairy-free, nutt-free, or vegan.  

And three . . . because I wanted to tell you my secret addiction.  Warm chocolate.  Brownies specifically. :)  Warm chocolate is simply in a whole different league than just a chocolate bar . . . 

So, start talking!!  What is it that YOU crave?

Friday, February 11, 2011

Valentines Day!

As I'm sure you are all well aware, a very sweet holiday is arriving on Monday of this week.  Everywhere I look lately I see hearts and candy.  Lots of candy.  My wide-eyed daughter saw it too and requested that we make three very specific things for her Daddy for Valentines day (which I'm sure is only slightly selfish in nature):  Lollipops, cookies, and heart-shaped chocolates.  And seeing as I got a candy thermometer and a linzer cookie cut out set for Christmas/Birthday from my ever-supportive mom . . . I said sure!!

So I picked the most interesting of the three to show you . . . lollipops.  I have never made hard candy before because it always looked so difficult.  It turns out that its actually not as bad as it looks.  And its gluten-free, egg-free, dairy-free, and nutt-free.  Now if only it was sugar-free and low-calorie it might be the perfect dessert. :)

Its a short shopping list for lollipops.

Hard Candy Molds
Lollipop sticks
2/3 C Light Corn Syrup (Not pictured)
2 C Sugar
3/4 C Water
1/4 tsp Food Coloring (gel or liquid)
Flavoring Oil - One Dram (LorAnn is a premium retailer)
Spray Vegetable Oil
Candy Thermometer
Small Saucepan (I suggest a 3 or 4 quart)


You begin by lightly oiling the candy molds.  Depending on the size of the molds, you will need several.  The bigger mold pictured you would need at least five, the smaller mold I would say closer to seven.  Since I wasn't sure how much the batch would make, I had four molds (two of each) and a greased cookie sheet.

Combine the sugar, water, and corn syrup.  Stir it over medium heat until the sugar is dissolved.  Once its dissolved, bring the mixture to a boil without stirring it by raising the heat.  At this point I would insert the thermometer and clip it to the side of the pan.  The bulb of the thermometer should be submerged in liquid but not touching the bottom of the pan.  


When the temperature on the thermometer reaches 260 degrees, add the food coloring.  Allow the natural boiling of the liquid to disperse the color for you.  


Allow it to continue to boil until 300 degrees and immediately remove it from the heat as the candy temperature will continue to rise while it is still boiling.  Wait until the liquid is no longer boiling, then add the flavoring oil and stir.  

Pour the liquid into the greased molds and/or onto the greased cookie sheet.  In the case of the cookie sheet, score marks for easier breaking later on.  I need some practice to make sure its the correct amount of liquid, but overall this step is fairly self-explanatory.  Put the lollipop sticks in the molds before or after pouring, it didn't seem to have too much of a different outcome.


After 30 minutes to an hour the molds/sheet should be cool enough to remove the candies.  And wha-la!  Lollipops!


And for an added bonus, cover them in little bags and use decorative twist-ties or ribbon to tie them closed.  


My daughter has already eaten two and given many to friends.  What a great gift idea!!

And just for pictures and a few more ideas . . .


Molded Chocolate Candies . . . 


Linzer Cookies (Well actually, sugar cookies with buttercream frosting)

And if you need more ideas check out Bakerella's site and the Pioneer Woman.  That should be enough for you to get the creative juices flowing, right?? :)

Happy Baking!!

Hard Candy / Lollipop
2
cups
sugar
2/3
cup
light corn syrup
3/4
cup
water
1/4
tsp
food coloring
1
tsp
flavoring
1
Lightly oil hard candy molds (vegetable oil).
2
In a large saucepan, mix together sugar, corn syrup and water. Stir over medium heat until sugar dissolves.
3
Bring mixture to a boil without stirring.
4
When syrup temperature reaches 260o F, add color. Do not stir; boiling action will incorporate color into syrup.
5
Remove from heat at 300 degrees or when drops of syrup form hard brittle threads in cold water. (Temperature will continue to rise after removing from heat, so remove precisely at 300 degrees).
6
After boiling action ceases, add flavoring and stir. USE CAUTION WHEN ADDING FLAVORING TO AVOID RISING STEAM.
7
Pour into lightly oiled candy molds (not chocolate molds), or onto greased cookie sheet and score to mark squares.
8
When cool, unmold or break into pieces. You can also dust with powdered sugar to prevent sticking. Store in airtight containers.
Servings: 24
Degree of Difficulty
Degree of Difficulty: Difficult
Nutrition Facts
Serving size: 1/24 of a recipe (1.2 ounces).
Percent daily values based on the Reference Daily Intake (RDI) for a 2000 calorie diet.
Nutrition information calculated from recipe ingredients. One of the recipe's ingredients was not linked. This ingredient is not included in the recipe nutrition data.
Amount Per Serving
Calories
92.96
Calories From Fat (2%)
1.83
% Daily Value
Total Fat 0.21g
<1%
Saturated Fat 0.03g
<1%
Cholesterol 0mg
0%
Sodium 6.26mg
<1%
Potassium 0.5mg
<1%
Total Carbohydrates 23.94g
8%
Fiber 0g
0%
Sugar 19.17g

Protein 0g
0%