Sunday, August 28, 2011

Snickerdoodles - Cookies and Bars (Betty Crocker)

Well, since my house seems to have made it through Irene with our power intact, I thought I would put up a post I've been working on since baking this past week.  Snickerdoodles are a scrumptious "sugar" cookie, covered in cinnamon sugar.  This is one of those cookies my family grew up making often, so it definitely reminds me of home.  And what better way to spend an hour on a rainy day then enjoy a cozy reminder of home?

For this recipe, I do not use my own, but a trusty friend's recipe.  I'm sure you've heard of her . . . Betty Crocker.  I might be her biggest fan -- because she's usually completely right on all fronts!! :)  Here is a link to her Snickerdoodle Cookie recipe that I will be following for this post.

So I pulled out my best friend . . .

(the most important appliance in my kitchen . . . )

And started to put together the ingredients.  You start with the softened butter, sugar and eggs . . . 


. . . cream them together until well-mixed on speed 2 (or by hand until it looks similar to the picture).  I prefer the mixers for creaming butter just because of their ability to break the butter into small pieces without making it too soft.


Then take all of the dry ingredients, add them together in a bowl, and whisk them together.  Turn your mixer back on speed two and add the ingredients slowly 1/2 C at a time until completely combined.  


. . . it should look something like this.  

This next step is just personal preference, but I like the fact that my cookies turn out nice and circular when I do this so I take it . . . refrigerate the mixture for at least an hour.  You can completely skip this step and go to the next stage to bake the cookies if you would prefer.  If you refrigerate, make sure you cover it in plastic wrap.


Once you are ready to begin, prepare your "rolling" bowl with 1/4 C sugar and 3 teaspoons of cinnamon well-mixed.  I usually just use a small cereal bowl for this as you can really only roll two cookies at a time.  Scoop out a teaspoon of cookie dough at a time, and roll it in your hands to form a smooth ball.  Drop in the cinnamon-sugar mixture and roll the dough around until entirely covered.


Put the rolled balls of dough about 2 inches apart on parchment-lined cookie sheets.  


And place in a oven preheated to 400 degrees F.  Bake for 8 - 10 minutes.  


They should be much puffier and prettier than these, but the basic look is the same . . . slightly cracked, and loaded with cinnamon-sugar goodness.  Apparently my baking soda was not the best . . . I have switched from store brand to Arm and Hammer since then, which has fixed my rising problem. :)  Remove them after 2 minutes of cooling and continue to cool on a wire rack.

Enjoy warm or cool . . . both ways are extremely satisfying! :)

And if you don't feel like cookies, but cookie-bars are more your speed -- try this recipe for Snickerdoodle Bars.  I did . . . and they were amazing . . . here's some pictures just to bait your taste buds.


So, if you have power this weekend on the East Coast and want a taste of home (or just cinnamon) - try one of these.  You won't be disappointed!!

Happy Baking!

*The recipe referred to on this blog post are not my own, but are solely the property of the Betty Crocker company.


Sunday, August 14, 2011

Apple Pie - Full Recipe

I came home from work yesterday evening and did just what I said . . . I made my hubby a pie.  And since the first time I posted about apple pie it was merely a picture, I decided to give you the full effect / recipe this time.

So lets get started.  This is what you will need for the crust . . .


Notice I am a fan of store brands except for Crisco.  I have learned the hard way store brand vegetable shortening simply doesn't measure up.  And I recommend unsalted butter for a better flavor, however, if you would like to go dairy-free or vegan on this recipe country crock or your favorite margarine brand will work just fine.

Grab your dry ingredients (flour, salt and baking powder) and put them in a bowl.  Mix them first to ensure even distribution.


Add your butter and Crisco (or margarine and Crisco).  I would suggest softening the butter just slightly before adding it.  Then grab my favorite pastry tool . . . a pastry blender.  I don't have a picture because my camera was misbehaving (don't worry, it was reprimanded appropriately....), but it is a must for the pastry chef.  Many people can achieve the same result with two forks splitting up the butter/Crisco, but I have found nothing gives me the gorgeous crumbles I want like the pastry blender.  If you don't have one . . . get one. :)


Aren't those crumbles just gorgeous??  That's exactly what you are looking for.

Then add your 6T of water and use your hands to work the dough until it sticks together.  You could probably get away with 5T but I like to use a little extra so that the crust doesn't get too dry in the next step . . . which is turning the ball of dough onto a floured surface and kneading until you have a smoother dough, about 10 times.  This step is often a feel and personal preference.  If you would like a flakier crust, knead the dough a bit less and let it look a little grainy.  If you are more concerned about a smooth texture, knead it slightly longer.


Put the dough aside or back in the bowl.  Now we're going to work with the filling.  There are several different preferences as to what type of apple you use to bake a pie.  Some people prefer the tart Granny Smith.  My favorite is usually an Empire or Cortland as far as type . . . but my real favorite, is anything that is freshly picked. :)  Since apple season is not quite in full swing, I settled for a store-bought bag of Red Delicious (more on the tart side).  Grab your apples, a comfortable knife and start peeling.  I often use an Apple Peeler/Corer/Slicer to accomplish this step if I am pressed for time, but sometimes . . . like tonight . . . I feel the need to be old fashioned.


So go ahead and peel . . . 


. . . and peel . . . until you've got 4 cups.  Or even a little more.  I like to use almost 5 and overload my pies. 

Hopefully it takes you less time then it took me.  Then again, I have a hard time not dropping apples because of my other baking project which pushes me away from my counter just slightly. :)


I'll let you know how that turns out in the end of October. :)

Back to the pie.  Once you have a bowl of gorgeous, peeled and sliced apples . . . 


Add sugar, cinnamon, and flour . . . 


. . . and mix it together.  


Then set them aside.  And back to the dough . . . 

Flour your surface again.  Very well . . . because this dough tends to stick more as you roll it out.  Split the dough about 3/4 to 1/4, and roll out the 3/4 until its about 1/8 inch thick and large enough to cover a pie pan.


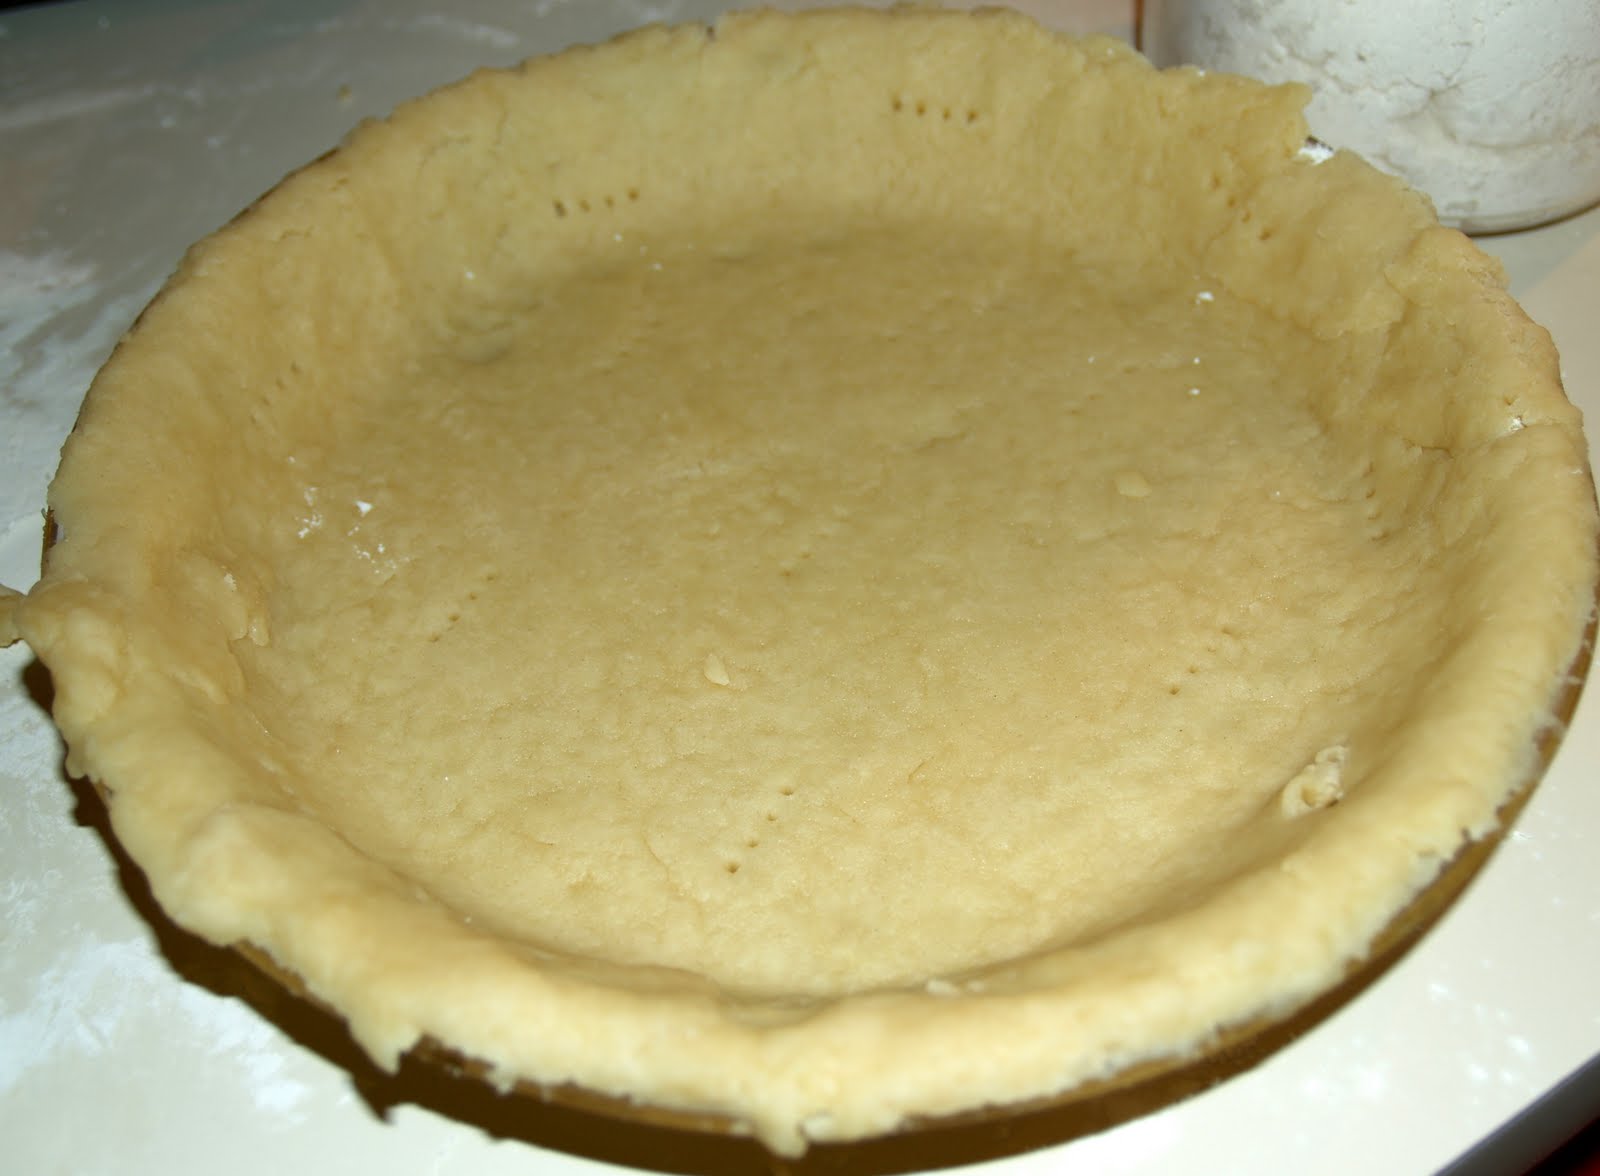
My pie plate of choice is always glass, and my favorite is the smallest, cheapest Pyrex.  I have tried deeper plates, metal plates . . . and I always come back to this one.  Fold the dough into fourths and place it in the pan.  Use a fork and gently run it around the outside edge of the plate until the entire plate is covered the scraps can be use for the top.


Use a fork to perforate the bottom and sides a few times each, which allows the dough to stretch without cracking.  And then fill that beautiful plate with those gorgeous apples . . 


 . . . try not to drool or eat it prematurely, and roll out the remaining 1/4 ball of dough and scraps.  Once you have it rolled out the diameter of the pie plate and width of about 4 or 5 inches . . . cut it into strips.  These strips will allow you to create my favorite pie top, and top I will use on this pie -- the lattice.  If you want to fully cover the pie, roll out the entire remaining dough and cover the pie, making several small slits in the top to release the steam.  Others prefer a crumble topping like that of an apple crisp.  I have never honestly tried the crumble, but I've heard its wonderful.  I personally prefer the lattice because, well, it looks pretty and also because the apples seem to cook more evenly this way.

So anyway, back to our strips of dough . . .


And weave them over the pie.  


Here again, you have varying ideas as to how to edge the pie.  I often see the technique in which you use your fingers to create a ruffled edge to the pie.  I prefer to take a fork and press it down lightly, sticking the top of the pie to the edge crust and then angle the fork at about 45 degrees and pull down, pulling off the extra dough.  It ends up looking like this . . . 


I'm not sure if its the ease with which you create the edge or just the fact that I don't like a thick crust, but this is my favorite way to do it.

Now, before baking the pie I do one last thing . . . cover the edges with foil.  I leave the foil on for about 35 of the 45 minutes baking the pie to avoid the edges burning since they are quite a bit thinner than the rest of the crust.  If you cover the whole pie, you might want to use the foil to cover the entire top until the last 15 minutes or so of baking for the same reason . . . you want the overall look to be a beautiful brown, not a black.


Now sit back and enjoy the smell in your house for the next 45 minutes.  And when it comes out . . . 


. . . looking oh so beautiful (see, even with the aluminum foil edging, the crust is still a little too brown . . . I'll have to make it thicker next time). . . plate it.  


. . . and devour it.  Mmmmm . . . 

I had a very happy husband last night. :)

Happy Baking!

Apple Pie
Pie Crust
2
cups
Flour
3/4
cups
Shortening
3
Tbs
Unsalted butter
1/2
tsp
Baking powder
1/4
tsp
Salt
6
tbs
cold water
Filling
4
cups
Apples, peeled, cored and sliced
1
tbs
Flour
1/2
cup
Sugar
Cinnamon (to taste)
Crust
1
Mix together dry ingredients (flour, baking powder, salt).
2
Add shortening and softened butter. Cut into dry ingredients with pastry blender until crumbly.
3
Add up to 6 T of water, mixing while adding, until the dough sticks together.
4
Remove crust from bowl and place on floured surface. Knead at least 10 times.
5
Divide dough into two parts. 3/4 in one part, 1/4 in another.
6
Roll out 3/4 of dough on a floured surface to about 1/8 inch thick.
7
Arrange dough on pie plate, trimming extra off edges. Perforate bottom and sides of dough to avoid cracking.
8
Roll out remaining 1/4 of dough and cut into 1/4 inch strips. Set aside.
9
Make filling - fill crust.
10
Using strips of dough, interweave them on top to create a lattice finish.
11
Using a fork, gently push down on edges of dough around the pie plate to attach the top dough to the bottom dough.
12
Cover the edges of the pie with aluminum foil.
13
Bake at 425 degrees for 35 minutes. Remove aluminum foil, bake for 10 more minutes or until apples are soft when pierced by a knife.
14
Cool and enjoy!
Filling
1
Mix apples, flour, sugar and cinnamon together in bowl.
Servings: 8
Degree of Difficulty
Degree of Difficulty: Moderately difficult
Cooking Times
Preparation Time: 1 hour
Cooking Time: 45 minutes
Total Time: 2 hours
Nutrition Facts
Serving size: 1/8 of a recipe (5.1 ounces).
Percent daily values based on the Reference Daily Intake (RDI) for a 2000 calorie diet.
Nutrition information calculated from recipe ingredients. One of the recipe's ingredients was not linked. This ingredient is not included in the recipe nutrition data.
Amount Per Serving
Calories
409.48
Calories From Fat (52%)
214.47
% Daily Value
Total Fat 23.96g
37%
Saturated Fat 10.55g
53%
Cholesterol 22.21mg
7%
Sodium 105.46mg
4%
Potassium 103.07mg
3%
Total Carbohydrates 45.8g
15%
Fiber 2.37g
9%
Sugar 19.06g

Protein 3.54g
7%


Saturday, August 13, 2011

Creamy Peanut Butter Pie . .

I know you haven't heard from me in a while, and for that I apologize.  I am hoping to get back into writing for you for at least the last two months of this pregnancy!

Despite my absence, I have been trying to keep up with my baking blogs and the community.  Very recently I have seen my favorite bloggers share a creamy peanut butter pie recipe, and also a story of a woman named Jenny.  She recently lost her husband to a heart attack . . . Her story brought tears to my eyes and I felt compelled to tell you all about it.  While I can't make this recipe in my own kitchen (because of my daughter's allergy) would you consider making one in memory?

I know I for one will be saying a prayer for Jenny and her family . . .  and baking my husband's favorite apple pie . . . tonight.


Tuesday, April 26, 2011

Coloring Fondant to Deep Colors

Hey all!  A few weeks back, I wrote a post about fondant.  I did not really cover coloring fondant, as I often prefer to avoid the hassle and simply buy the fondant pre-colored.  This, however, is not always possible, and you are left to color your own fondant.  The lighter colors are easily done with gel color, but the darker colors are extremely difficult to achieve without ruining the consistency of the fondant.  One of my favorite blogs, cakesdusoleil, just wrote a post covering how to color without changing the consistency.  She deals with blue, red and black which are the hardest of all of them.

As a side note, she is also an incredibly gifted sugar artist with amazing tutorials ... if you have a few minutes take a look.

Happy Baking!!

Thursday, April 21, 2011

Sugar and Spice and Everything Nice . . .

Hello all!  I have missed talking with you every week!  However, there is a good reason for my absence . . . . I am currently baking our second child! :)  We are very excited and looking forward to our new adventure.  However, this excitement comes with a clause . . . I won't be writing for a while!  :(  As with my sweet daughter, this child has blessed me with all-day sickness, for which I take medication and make the occasional trip to the hospital for dehydration.  So far this pregnancy has been better, but I am still classified as having "hypermesis gravidarum" which is a condition less than one percent of pregnant woman have.  Thankfully I have a mild case that can be treated with prescription medication, as some women with this condition spend the entire pregnancy on iv's.  But as you can guess, I am extremely sensitive to smell and often cannot cook at all . . . which unfortunately also rules out baking.

As soon as I feel better, I am sure I will be back at it again with renewed vigor until our next little one arrives.  But until then, if you see me few and far between . . . at least you know why. :)

Happy Baking!

Wednesday, March 9, 2011

A Word on Fondant

Hello all!  After posting my last cake I have received several comments from people who have not yet tried covering a cake with fondant and would like to learn.  I am actually less than an expert at this so I'd like to direct you to a few sources that might be a whole lot better to learn from.  Before I do, let me share with you a few things I've learned about fondant.

There are two widely used brands of fondant:  Satin Ice and Wilton.  Wilton is very easy to use and I would recommend it for a beginner, however it is definitely not the best tasting stuff in the world.  Generally when I use Wilton, I put a very thick layer of buttercream underneath so that those eating the cake have the ability to peal it off and eat the cake with only buttercream. :)  Satin Ice, on the other hand, tastes much, much better than Wilton's.  The only difference with Satin Ice, is that it is much more supple than Wilton's and therefore needs to be rolled slightly thicker than Wilton's.  Satin Ice is also not as commonly carried, but can be ordered online fairly inexpensively from retailers such as Global Sugar Art.

Now there are more options for fondant than just these two.  The newest fondant is called Fondarific.  I just ordered a sample pack recently so I cannot speak for how it handles, but I will speak for how it tastes.  It is by far the best I have tasted, and has the most variety of flavors.  There is also Marshmallow Fondant which you can make at home.  I think it tastes kind of like those orange circus peanut candies which I am not totally fond of, but most people really enjoy the taste over others.  The link built in for you is for Edna de la Cruz's site.  She has some excellent tutorials and recipes if you ever need help with anything.

As for coloring the fondant, while it can be done at home, I suggest simply ordering the color you wish to use.  Coloring the fondant itself can really change the consistency of the fondant and make it difficult to work with.  To me, its just not worth the time it takes to mess with the color, its just better to get them premixed.  Most fondants, if wrapped properly, will last for 6 months, making for less waste.

So on to covering the cake.  Wilton has a step-by-step method written out on their website.  There are many videos on You Tube as well.  Personally, I think its easier to learn when you are hands-on.  For that I would recommend a fondant class at your local Michael's.  If you watch for sales, the class itself only cost around $25, although the tools may cost you up to $100.  The nice part is, however, the tools are all made well and last for a very long time, so you can look at it as an investment into your future cake decorating.  Once you do it and get the hang of it, fondant is a fun medium to work with and really looks professional when all is said and done.

Next time I work with fondant, I will see if I can put together a tutorial or at least some pictures.  Please let me know if there is anything else you are looking to find out and I will happily research it for you.

Happy Baking!!

Saturday, February 26, 2011

Safari / Jungle Cake

The hardest part of making a cake is always delivering it.  Its like you are dropping off your child.  Ok, not that bad, but I often feel that way when I see it go. :)  C'est la vie.

It has been delivered and my friend LOVED it. :)  Actually loved might be a little understated.  She jumped up and down and screamed.  I don't think I've ever gotten such a great reaction to anything I've done before!

And I hope you all agree, so without further ado . . .


Happy Baking!

Friday, February 25, 2011

Fondant Safari Animals - Part II

I know I promised these a few days ago, but I get kinda swept up in the moment when making a cake and forget about everything else, so please forgive me.  As promised, here are the lion and hippo . . . 


They have since joined their friends on the side of the cake, which is a beautiful sky blue color.  Oh, and here are the tree bottoms:


Which have also joined their friends on the cake and been adorned with bush-like leaves, and enjoying the feel of the grass whipping against their sugary trunks . . . 

Oh wait, did I forget to tell you that the cake was done?  I did?  Silly me!!  It is stacked and decorated in all its coolness in my refrigerator.

Happ.......

I'm sorry, were you expecting pictures? :)  I know, I'm terrible . . . but at least you gave me a good laugh.  I do not show pictures of cakes on the blog until the cake is delivered.  And since I am delivering it tomorrow morning I should expect to see you all up, awake, and checking my blog between 10 am and 12 pm for final pictures. :)

Lets try this again . . . 

Happy Baking!! 


Wednesday, February 23, 2011

Fondant Safari Animals

This week I got a call from a friend asking if I could make a cake.  I had a general idea of what she was looking for, so I went online for some ideas.  In the process I realized that I was going to need to make a few fondant safari animals, specifically an elephant, tiger, giraffe, zebra, and hippo.  The question was then whether I should make them two dimensional or three dimensional.

And so, I drew out a design.


Gotta love the drawings right?  Maybe I should go to art school someday . . . 

I tried the cake idea with 2D animals.  My friend came back and asked that we remove the age and the snake, but loved the rest of the cake.  No problem!  So I thought a little bit more and decided . . . lets convert one of these animals to 3D for the top of the cake.  The birthday girl's favorite animal was the elephant - which made this choice very easy!

I found a great tutorial on You Tube from Tea for Two Bakery in Ontario, Canada.  It was so good, I wanted to share it with you (with her permission of course)!


While watching the video, I attempted the process.  What I ended up with was so amazing, I couldn't even believe I had made it!  Great tutorial Tea for Two!!

Before Eyes . . . 


I was super-pleased with how he came out and so I decided to try and attempt a few 3D birds to replace the snakes on the cake . . . 


Two cockatoos, and two parrots.

(In case you are wondering they are drying on greased wax paper so that they don't stick.)

The elephant took approximately 40 min to an hour, and the birds (all four) took about an hour (including coloring the fondant).  I was in love. :)

I began on the 2D animals next.  There are very few cookie-cutters or outlines that looked the way I wanted the animals to, so I ended up drawing my own outlines for all four animals.  I began last night with the zebra and giraffe.

I should mention that since I am crunched for time to finish the cake, I do not have tutorials on anything I did.  However, I have had a blast making them and could easily be convinced to do one or two tutorials and even post the outlines of the animals for you to use.  Just leave me a comment and I will be happy to reply. :)

Ok, so without further ado . . . the giraffe and zebra.


And this is the pan drying in my kitchen:


Tonight will be lions and hippos, and tomorrow the cake assembly will begin.  Look for more posts as the week goes.  And again, if you want to see any of these as a tutorial or you want the outlines, leave me a comment. :)

Happy Baking!