Showing posts with label Nutt-free. Show all posts

Sunday, August 28, 2011

Snickerdoodles - Cookies and Bars (Betty Crocker)

Well, since my house seems to have made it through Irene with our power intact, I thought I would put up a post I've been working on since baking this past week.  Snickerdoodles are a scrumptious "sugar" cookie, covered in cinnamon sugar.  This is one of those cookies my family grew up making often, so it definitely reminds me of home.  And what better way to spend an hour on a rainy day then enjoy a cozy reminder of home?

For this recipe, I do not use my own, but a trusty friend's recipe.  I'm sure you've heard of her . . . Betty Crocker.  I might be her biggest fan -- because she's usually completely right on all fronts!! :)  Here is a link to her Snickerdoodle Cookie recipe that I will be following for this post.

So I pulled out my best friend . . .

(the most important appliance in my kitchen . . . )

And started to put together the ingredients.  You start with the softened butter, sugar and eggs . . . 


. . . cream them together until well-mixed on speed 2 (or by hand until it looks similar to the picture).  I prefer the mixers for creaming butter just because of their ability to break the butter into small pieces without making it too soft.


Then take all of the dry ingredients, add them together in a bowl, and whisk them together.  Turn your mixer back on speed two and add the ingredients slowly 1/2 C at a time until completely combined.  


. . . it should look something like this.  

This next step is just personal preference, but I like the fact that my cookies turn out nice and circular when I do this so I take it . . . refrigerate the mixture for at least an hour.  You can completely skip this step and go to the next stage to bake the cookies if you would prefer.  If you refrigerate, make sure you cover it in plastic wrap.


Once you are ready to begin, prepare your "rolling" bowl with 1/4 C sugar and 3 teaspoons of cinnamon well-mixed.  I usually just use a small cereal bowl for this as you can really only roll two cookies at a time.  Scoop out a teaspoon of cookie dough at a time, and roll it in your hands to form a smooth ball.  Drop in the cinnamon-sugar mixture and roll the dough around until entirely covered.


Put the rolled balls of dough about 2 inches apart on parchment-lined cookie sheets.  


And place in a oven preheated to 400 degrees F.  Bake for 8 - 10 minutes.  


They should be much puffier and prettier than these, but the basic look is the same . . . slightly cracked, and loaded with cinnamon-sugar goodness.  Apparently my baking soda was not the best . . . I have switched from store brand to Arm and Hammer since then, which has fixed my rising problem. :)  Remove them after 2 minutes of cooling and continue to cool on a wire rack.

Enjoy warm or cool . . . both ways are extremely satisfying! :)

And if you don't feel like cookies, but cookie-bars are more your speed -- try this recipe for Snickerdoodle Bars.  I did . . . and they were amazing . . . here's some pictures just to bait your taste buds.


So, if you have power this weekend on the East Coast and want a taste of home (or just cinnamon) - try one of these.  You won't be disappointed!!

Happy Baking!

*The recipe referred to on this blog post are not my own, but are solely the property of the Betty Crocker company.


Sunday, August 14, 2011

Apple Pie - Full Recipe

I came home from work yesterday evening and did just what I said . . . I made my hubby a pie.  And since the first time I posted about apple pie it was merely a picture, I decided to give you the full effect / recipe this time.

So lets get started.  This is what you will need for the crust . . .


Notice I am a fan of store brands except for Crisco.  I have learned the hard way store brand vegetable shortening simply doesn't measure up.  And I recommend unsalted butter for a better flavor, however, if you would like to go dairy-free or vegan on this recipe country crock or your favorite margarine brand will work just fine.

Grab your dry ingredients (flour, salt and baking powder) and put them in a bowl.  Mix them first to ensure even distribution.


Add your butter and Crisco (or margarine and Crisco).  I would suggest softening the butter just slightly before adding it.  Then grab my favorite pastry tool . . . a pastry blender.  I don't have a picture because my camera was misbehaving (don't worry, it was reprimanded appropriately....), but it is a must for the pastry chef.  Many people can achieve the same result with two forks splitting up the butter/Crisco, but I have found nothing gives me the gorgeous crumbles I want like the pastry blender.  If you don't have one . . . get one. :)


Aren't those crumbles just gorgeous??  That's exactly what you are looking for.

Then add your 6T of water and use your hands to work the dough until it sticks together.  You could probably get away with 5T but I like to use a little extra so that the crust doesn't get too dry in the next step . . . which is turning the ball of dough onto a floured surface and kneading until you have a smoother dough, about 10 times.  This step is often a feel and personal preference.  If you would like a flakier crust, knead the dough a bit less and let it look a little grainy.  If you are more concerned about a smooth texture, knead it slightly longer.


Put the dough aside or back in the bowl.  Now we're going to work with the filling.  There are several different preferences as to what type of apple you use to bake a pie.  Some people prefer the tart Granny Smith.  My favorite is usually an Empire or Cortland as far as type . . . but my real favorite, is anything that is freshly picked. :)  Since apple season is not quite in full swing, I settled for a store-bought bag of Red Delicious (more on the tart side).  Grab your apples, a comfortable knife and start peeling.  I often use an Apple Peeler/Corer/Slicer to accomplish this step if I am pressed for time, but sometimes . . . like tonight . . . I feel the need to be old fashioned.


So go ahead and peel . . . 


. . . and peel . . . until you've got 4 cups.  Or even a little more.  I like to use almost 5 and overload my pies. 

Hopefully it takes you less time then it took me.  Then again, I have a hard time not dropping apples because of my other baking project which pushes me away from my counter just slightly. :)


I'll let you know how that turns out in the end of October. :)

Back to the pie.  Once you have a bowl of gorgeous, peeled and sliced apples . . . 


Add sugar, cinnamon, and flour . . . 


. . . and mix it together.  


Then set them aside.  And back to the dough . . . 

Flour your surface again.  Very well . . . because this dough tends to stick more as you roll it out.  Split the dough about 3/4 to 1/4, and roll out the 3/4 until its about 1/8 inch thick and large enough to cover a pie pan.


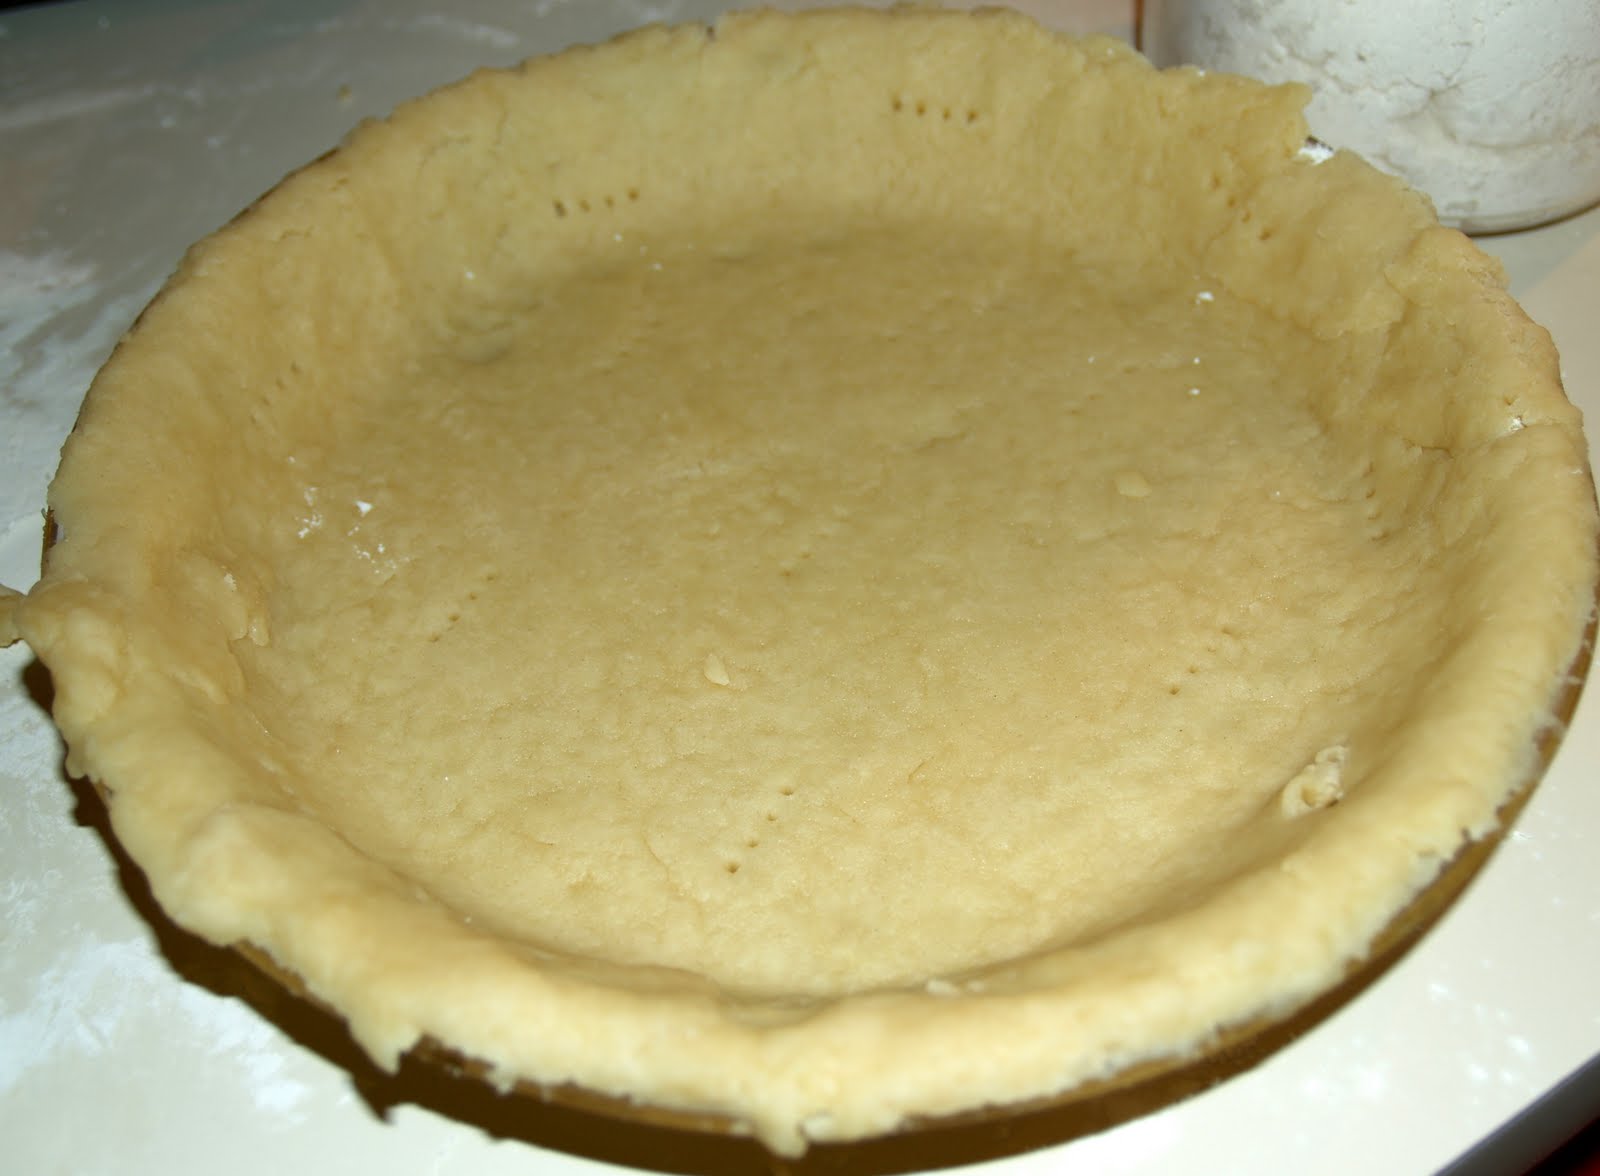
My pie plate of choice is always glass, and my favorite is the smallest, cheapest Pyrex.  I have tried deeper plates, metal plates . . . and I always come back to this one.  Fold the dough into fourths and place it in the pan.  Use a fork and gently run it around the outside edge of the plate until the entire plate is covered the scraps can be use for the top.


Use a fork to perforate the bottom and sides a few times each, which allows the dough to stretch without cracking.  And then fill that beautiful plate with those gorgeous apples . . 


 . . . try not to drool or eat it prematurely, and roll out the remaining 1/4 ball of dough and scraps.  Once you have it rolled out the diameter of the pie plate and width of about 4 or 5 inches . . . cut it into strips.  These strips will allow you to create my favorite pie top, and top I will use on this pie -- the lattice.  If you want to fully cover the pie, roll out the entire remaining dough and cover the pie, making several small slits in the top to release the steam.  Others prefer a crumble topping like that of an apple crisp.  I have never honestly tried the crumble, but I've heard its wonderful.  I personally prefer the lattice because, well, it looks pretty and also because the apples seem to cook more evenly this way.

So anyway, back to our strips of dough . . .


And weave them over the pie.  


Here again, you have varying ideas as to how to edge the pie.  I often see the technique in which you use your fingers to create a ruffled edge to the pie.  I prefer to take a fork and press it down lightly, sticking the top of the pie to the edge crust and then angle the fork at about 45 degrees and pull down, pulling off the extra dough.  It ends up looking like this . . . 


I'm not sure if its the ease with which you create the edge or just the fact that I don't like a thick crust, but this is my favorite way to do it.

Now, before baking the pie I do one last thing . . . cover the edges with foil.  I leave the foil on for about 35 of the 45 minutes baking the pie to avoid the edges burning since they are quite a bit thinner than the rest of the crust.  If you cover the whole pie, you might want to use the foil to cover the entire top until the last 15 minutes or so of baking for the same reason . . . you want the overall look to be a beautiful brown, not a black.


Now sit back and enjoy the smell in your house for the next 45 minutes.  And when it comes out . . . 


. . . looking oh so beautiful (see, even with the aluminum foil edging, the crust is still a little too brown . . . I'll have to make it thicker next time). . . plate it.  


. . . and devour it.  Mmmmm . . . 

I had a very happy husband last night. :)

Happy Baking!

Apple Pie
Pie Crust
2
cups
Flour
3/4
cups
Shortening
3
Tbs
Unsalted butter
1/2
tsp
Baking powder
1/4
tsp
Salt
6
tbs
cold water
Filling
4
cups
Apples, peeled, cored and sliced
1
tbs
Flour
1/2
cup
Sugar
Cinnamon (to taste)
Crust
1
Mix together dry ingredients (flour, baking powder, salt).
2
Add shortening and softened butter. Cut into dry ingredients with pastry blender until crumbly.
3
Add up to 6 T of water, mixing while adding, until the dough sticks together.
4
Remove crust from bowl and place on floured surface. Knead at least 10 times.
5
Divide dough into two parts. 3/4 in one part, 1/4 in another.
6
Roll out 3/4 of dough on a floured surface to about 1/8 inch thick.
7
Arrange dough on pie plate, trimming extra off edges. Perforate bottom and sides of dough to avoid cracking.
8
Roll out remaining 1/4 of dough and cut into 1/4 inch strips. Set aside.
9
Make filling - fill crust.
10
Using strips of dough, interweave them on top to create a lattice finish.
11
Using a fork, gently push down on edges of dough around the pie plate to attach the top dough to the bottom dough.
12
Cover the edges of the pie with aluminum foil.
13
Bake at 425 degrees for 35 minutes. Remove aluminum foil, bake for 10 more minutes or until apples are soft when pierced by a knife.
14
Cool and enjoy!
Filling
1
Mix apples, flour, sugar and cinnamon together in bowl.
Servings: 8
Degree of Difficulty
Degree of Difficulty: Moderately difficult
Cooking Times
Preparation Time: 1 hour
Cooking Time: 45 minutes
Total Time: 2 hours
Nutrition Facts
Serving size: 1/8 of a recipe (5.1 ounces).
Percent daily values based on the Reference Daily Intake (RDI) for a 2000 calorie diet.
Nutrition information calculated from recipe ingredients. One of the recipe's ingredients was not linked. This ingredient is not included in the recipe nutrition data.
Amount Per Serving
Calories
409.48
Calories From Fat (52%)
214.47
% Daily Value
Total Fat 23.96g
37%
Saturated Fat 10.55g
53%
Cholesterol 22.21mg
7%
Sodium 105.46mg
4%
Potassium 103.07mg
3%
Total Carbohydrates 45.8g
15%
Fiber 2.37g
9%
Sugar 19.06g

Protein 3.54g
7%


Thursday, February 17, 2011

Love and Creme Brulee

As I have already told you, Valentine's Day was almost entirely planned for us by my three year old daughter.  After telling you that, I felt I really should show you some pictures of the adorable table settings she arranged before digging in to the sweet stuff!


Isn't she adorable??

And as an added bonus, you can see my special dinner.  Pork loin rolled in herbs and wrapped in bacon....Thank you dear cousin!!


Don't blink, its the last time you'll see me make something so decadent (or good!) cooking-wise. . . As they say, you are either a cook or a baker.  And as you can probably guess, I am the latter. :)

Ok, now onto the sweet stuff.  My husband's favorite dessert is creme brulee.  He was introduced to it merely 2 years ago and I think he's been begging me since then to try making it.  I figured, what better time to try it then Valentine's Day?  So I went to Bed Bath and Beyond and picked up their Creme Brulee set, looked up an online recipe, and went to town!

To begin you take 8 egg yolks and beat them, then add 1/2 C of sugar and mix them until they are well combined.

Then take 2 Cups of heavy cream and heat it to right below simmering.  Once heated, add 1/4 Cup of the cream, (1 tablespoon at a time) to the egg mix.  You don't want to heat the eggs up too quickly as they will cook prematurely.  This process is referred to as "tempering".


Once you temper in 1/4 cup of cream, you can add the remaining cream to the eggs.  You then add the 1/2 teaspoon of vanilla to the mixture.


Then strain the mixture through a fine mesh sieve, before pouring it into the ramekins.  This creates a really smooth custard.


Now boil about 4 cups of water.  You'll need that in a minute.  While you're at it, preheat the oven to 250.  There, I'll stop being demanding now. 

Now to pour the mixture into the ramekins.  I started by filling the 4 - 3oz ramekins first since that is what came with the kit.  However, I was very glad I had picked up two much larger 8oz ramekins for overflow, since there was plenty of it.  I would suggest getting more of the 3oz ramekins rather than having overflow into larger ramekins.  The end result of the large ones seems to be a little too much custard.

Next place the ramekins in a deeper 9x13 pan, and pour in the boiling water around them until the water rests half-way up the side of the ramekin.


Then insert them into the oven, and bake for about 50 minutes.  After 50 minutes, take rubber-tipped tongs and remove one of the ramekins, slightly shaking it.  If the inner portion of the custard still jiggles while the outside is firm, they are done.  If they do not jiggle at all, but are firm all the way through, they are slightly overdone but don't worry, they are still delicious!!  If they are not quite done, cook them at 10 minute intervals until they are finished.


Remove them from the oven, and put them on a wire cookie rack to cool.  Allow them to cool to room temperature before placing them in the refrigerator.  


At this point, the recipe states that you should leave the custard in the refrigerator overnight.  Since I completely missed that when I read the instructions the first time and wanted them done more quickly, I took the two we were going to eat that evening and refrigerated them for two hours.  I left the remaining brulees to cool overnight with the intention of trying them the following day to see if the time elapsed made any difference. 

In the meantime, lets continue on with the brulees which were only refrigerated for only two hours.  Remove the two brulees from the refrigerator and cover the tops with approximately 1 tsp of regular refined white sugar.  Light your torch, and hold it so the flame is almost parallel to the top of the dessert, then angle it slightly towards the sugary top and allow the sugar to begin to caramelize.  How fast/slow the sugar melts and begins to look like caramel is dependent upon how close the flame is, and how fast you move the flame over the sugar.  After the first one, you sort of get a feel for it.

And wha-la!  Beautiful and impressive desserts!


They were delicious!

The following evening, I removed one of the remaining brulees from the refrigerator (an 8 oz version) and decided to try a different sugar on the top.  I added approximately 1 tablespoon of turbinado sugar, gently spreading it evenly over the top of the custard, and grabbed my blow torch.

I know, I know, its a culinary torch . . . but blow torch sounds soo much cooler.


I probably should have mentioned this earlier but I am somewhat of a pyro.  Turning on the torch brought back memories of flaming marshmallows and campfires, burning sticks while it dwindled . . . and I had to snap myself out of my fiery trance and return to the task at hand.


Forgive the blurry picture, but I have to say its hard to take a picture with one hand and torch evenly with the other.  I was not as impressed with the turbinado sugar as far as taste, but I have to admit it caramelized much more quickly than the refined white sugar.  The custard taste was pretty much the same as the night before, so I would say its probably safe to only refrigerate the custard for two hours rather than overnight.  At least for this recipe.

All in all, this was by far not the most delicious creme brulee I had tasted, but a very good home equivalent.  I have a few ideas for remedying that in the future but for now, I will say if you like the dessert, this is an easy home equivalent! 

Recipe again courtesy of Michael Chu.

Creme Brulee
8
egg yolks
1/2
cup
sugar
2
cups
heavy cream
1/2
tsp
vanilla
10
tsp
sugar
1
Pour the sugar into the egg yolks.
2
Beat the yolks and sugar until smooth.
3
Heat the heavy cream until almost simmering (you can bring to a simmer and let it cool a minute).
4
Add heavy cream to the egg yolks one tablespoon at a time while stirring vigorously until 1/4 cup of the heavy cream has been added.
5
Add the remaining cream to the mixture.
6
Add in 1/2 tsp of vanilla and stir.
7
Pour custard through a fine mesh sieve.
8
Pour the strained mixture into 8 -10 3-oz ramekins.
9
Place the ramekins in a baking pan. Pour boiling water into the pan (be careful not to get water into the ramekins), so that the water level is halfway up the sides of the ramekins.
10
Place in an oven preheated to 250°F for about one hour.
11
After 50 minutes, check to see if the custards are done. We want them to be set on the outside edge, but jiggly (like jello) at the center. The easiest way to do this is to take a pair of tongs with food grade rubber bands wrapped around the ends to help grip the ramekins. Pick up a ramekin and shake to see if the centers jiggle. If only the center jiggles a little, it's done. If the whole thing is set, remove immediately - it'll be a little over done, but still delicious. If it's not done, just put it back in the water bath and check again in ten minutes.
12
nce the custards are done, let them cool on a cooling rack to room temperature.
13
Refrigerate custards for two hours.
14
Remove the custard and spread 1 tsp of sugar over each custard.
15
Light your torch, and hold it so the flame is almost parallel to the top of the dessert, then angle it slightly towards the sugary top and allow the sugar to caramelize.
Servings: 10
Degree of Difficulty
Degree of Difficulty: Moderately difficult
Cooking Times
Preparation Time: 20 minutes
Cooking Time: 1 hour
Inactive Time: 2 hours
Total Time: 3 hours and 30 minutes
Nutrition Facts
Serving size: 1/10 of a recipe (1.8 ounces).
Percent daily values based on the Reference Daily Intake (RDI) for a 2000 calorie diet.
Nutrition information calculated from recipe ingredients.
Amount Per Serving
Calories
180.78
Calories From Fat (61%)
109.6
% Daily Value
Total Fat 12.37g
19%
Saturated Fat 6.77g
34%
Cholesterol 176.83mg
59%
Sodium 15.62mg
<1%
Potassium 33mg
<1%
Total Carbohydrates 15.37g
5%
Fiber 0g
0%
Sugar 14.3g

Protein 2.6g
5%